
Programming
django-sorting
There is also an easy way to sort tabular data this time using django-sorting (https://github.com/directeur/django-sorting). Setup is described in...
The need may arise for different versions of the same image to be used in different parts of your site. ImageKit is an app that takes care of processing your source image and storing and retrieving the different versions. The project’s github page with install and usage instructions is at https://github.com/jdriscoll/django-imagekit. In …
The need may arise for different versions of the same image to be used in different parts of your site. ImageKit is an app that takes care of processing your source image and storing and retrieving the different versions. The project’s github page with install and usage instructions is at https://github.com/jdriscoll/django-imagekit.
In this post I’ll be giving examples of ImageKit usage and then show how to make your own ImageProcessor.
Suppose you have an app named image_app that has a gallery page with image thumbnails. Clicking on a thumbnail in the gallery page will send you to a kind of profile page with a black and white portrait image. Clicking on that image will show you the original, full-sized image. This means you have to store three versions of the image.
From models.py:
from django.db import models
from imagekit.models import ImageModel

class Photo(ImageModel)
    name = models.CharField(max_length=100)
    original_image = models.ImageField(upload_to='photos')

class IKOptions:
    spec_module = 'image_app.specs'
    cache_dir = 'photos'
    image_field = 'original_image'
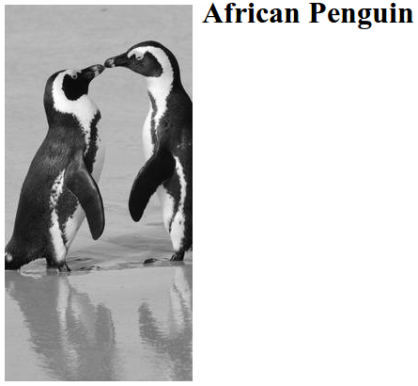
The following image is stored in original_image:

The spec_module referenced is specs.py in the image_app directory:
from imagekit.specs import ImageSpec
from imagekit import processors

class ResizeThumb(processors.Resize):
    width = 100
    height = 75
    crop = True

class EnchanceThumb(processors.Adjustment):
    contrast = 1.2
    sharpness = 1.1

class Thumbnail(ImageSpec):&
    access_as = 'thumbnail_image'
    pre_cache = True
    processors = [ResizeThumb, EnchanceThumb]
All ImageSpecs (currently just Thumbnail) are applied to original_image because the specs.py file was specified in IKOptions in Photo.
The part of the template that outputs the thumbnails is:
Which produces something like:

Moving onto the profile page, the following are added to specs.py:
class ToBWProcessor(processors.ImageProcessor):
    @classmethod
    def process(cls, img, fmt, obj):
        img = img.convert('L')
        return img, fmt

class ResizeDisplay(processors.Resize):
    width = 200
    height = 400
    crop = True

class Display(ImageSpec):
    processors = [ResizeDisplay, ToBWProcessor]
ToBWProcessor is a custom ImageProcessor that makes the image black and white. This could actually also be accomplished using an Adjustment (like the one used for Thumbnail) and setting color to 0.0 but it was done with an ImageProcessor for demo purposes. The process class method of an ImageProcessor is passed the PIL Image object img, the image format type (JPEG, PNG, etc.) in the string fmt, and the model instance obj. It should return the tuple of img, fmt.
The image is displayed in the template by:
    <img src="" />

Resulting in:

As can be seen, ImageKit performs much of the work of having multiple versions of the same image.
It is also very customizable as custom image processors can be made to process images.
As can be seen, ImageKit performs much of the work of having multiple versions of the same image.
It is also very customizable as custom image processors can be made to process images.
Photo by Paul Mannix (http://www.flickr.com/photos/19511776@N00) licensed under Creative Commons Attribution (http://creativecommons.org/licenses/by/3.0/)
There is also an easy way to sort tabular data this time using django-sorting (https://github.com/directeur/django-sorting). Setup is described in...
Note: Django Static Files (django-staticfiles) has been included as a contrib app in django 1.3. However, for the most cutting edge features, and...
**This article refers to an older version of the Facebook developers page and api, and may have changed since the writing** Being the biggest social...