Programming
Django Unit Testing with Vim
The last post we’ve shared included setting up & using Vim for Python/Django-related development. I’ll assume throughout the guide that you’ve been...
In this article, we talk about how to configure a Django development environment using VirtualBox as a development server, and your host machine as a means for writing the code. In concept, this should be doable on any VM software, but I’ll just focus on using VirtualBox. But why the …
In this article, we talk about how to configure a Django development environment using VirtualBox as a development server, and your host machine as a means for writing the code. In concept, this should be doable on any VM software, but I’ll just focus on using VirtualBox.
But why the heck would we do it? Shouldn’t virtualenv be enough? Here are some advantages and disadvantages that this kind of setup has:
Advantages:
Disadvantages:
Installing VirtualBox
We start with the easy stuff. We simply need to get the VirtualBox installer from this page: https://www.virtualbox.org/wiki/Downloads. In my case, since I am using Ubuntu, I downloaded the *.deb file. The download page should be easy to understand too. Alternatively, in Ubuntu, we can just invoke the
sudo apt-get install virtualbox
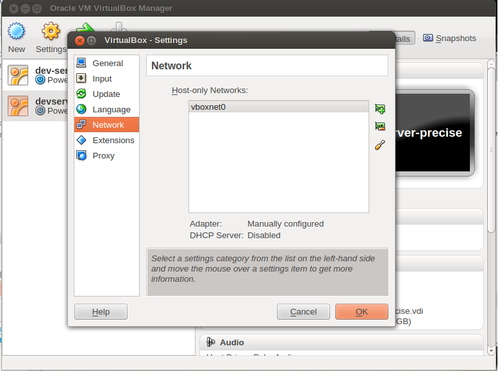
Illustration 1: Creating a Host-Only Network
To begin, we need to download the appropriate *.iso of choice for our guest machine. I used Ubuntu 11.10-alternate (soon to be upgraded to 12.04 – an LTS release, so that it will finally feel like a server) for the moment. I would like to say that from here on out, I might be using Ubuntu-specific commands without warning.
We need to create a guest machine for VirtualBox. We just need to click that big “New” button on the top in VirtualBox’s UI. This will take you to a wizard where most of the prompts should be self explanatory. The base memory size I allocated for my guest machine is just 160MB since it is a command-line environment and I will be the only user for now, so it should not need much RAM (plus I don’t have much RAM as well). Adjust accordingly if you wish. We’ll just create a new hard disk. Whether it is dynamically-sized or fixed, it’s up to you. I also just allocated 2.5GB for it, but again, you’re welcome to put in more, if you feel like it. 2.5G has been pretty sufficient for me. The rest should be just clicking next all the way and we shall have created our new guest machine. Go to the settings window of the guest machine and into the network part. Assign the VirtualBox host only network we just recently created as the first adapter and NAT as the second adapter. We can choose to assign the second adapter as a bridged adapter if you want to share your virtual machine to others.
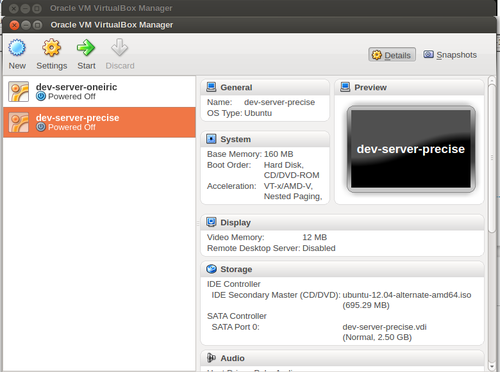
Illustration 2: The New Button over there!

Illustration 3: Guest settings — network
Now, power on the machine and it will prompt you with a “First Run Wizard” thingy and will prompt you where your machine will be booting. Select the *.iso file you have downloaded and start. Remember to install a command-line only environment or the 160MB RAM will not be enough. I am not going through the installation steps as I am hoping we know this already (or there are others with far better instructions). Also, just an optional thing, I named my user with “vdev” and gave it the password “vdev”.
Now that we have installed our guest machine, there are now packages that needs some installing. These are:
This ends part 1 of the post for Creating a Virtual Development Server for Django Projects.
See Part 2 for more.
The last post we’ve shared included setting up & using Vim for Python/Django-related development. I’ll assume throughout the guide that you’ve been...
While Lean has its origins in manufacturing, it can be applied to Software Development. There are many methodologies that can be used depending on...
At Bixly, we are thoughtful about cultivating a virtual environment for our clients and team-members to organize, monitor, and collaborate on...