Using Eclipse with PyDev as an IDE for your development on your Django project can be very helpful in many ways. Since it is integrated, the eclipse has the access to some of the compiler’s information, which means you got assistance in code writing. This includes code hinting, auto-completion, error checking, and navigating through libraries by just a single click or two. You also get to have a scheme for your code, making it easier to read. PyDev comes with a variety of stuff you’d really love. It has Django integration, Code completion, Syntax highlighting, Code analysis, Unittest integration, Interactive console and many others to mention (see http://pydev.org).
There are four parts to this procedure. First, you need to install JDK since it is the Eclipse prerequisite. You can then proceed to installing Eclipse. Installing PyDev for eclipse is necessary so that working with Django should be on the go. And finally, test the eclipse by creating a sample project.
Installing Java Development Kit (JDK) on Ubuntu
Open a terminal and execute the following line:
sudo apt-get install openjdk-7-jdk
or you can install sunjdk. The sun jdk isn’t included in the official repository, so you need to add a PPA for that.
sudo add-apt-repository ppa:ferramroberto/java
sudo apt-get update
sudo apt-get install sun-java6-sdk sun-java6-plugin
Installing Eclipse 3.7.2 on Ubuntu
- Download Eclipse. You may have to select what package you want to use. Runwget <url> to download the package.
- Extract it.
tar xzf eclipse-SDK-3.7-linux-gtk-x86_64.tar.gz
- Move to /opt/folder
sudo mv eclipse /opt/
sudo chown –R root:root eclipse
sudo chmod –R +r eclipse
- Create an eclipse executable in your path and save the file.
sudo touch /usr/bin/eclipse
sudo chmod 755 /usr/bin/eclipse
sudo nano /usr/bin/eclipse
copy this into nano
#!/bin/sh
#export MOZILLA_FIVE_HOME=”/usr/lib/mozilla/”
export ECLIPSE_HOME=”/opt/eclipse”

$ECLIPSE_HOME/eclipse $*
- Create a gnome menu item and save the file.
sudo nano /usr/share/applications/eclipse.desktop
copy this into nano
            [Desktop Entry]
            Encoding=UTF-8
            Name=Eclipse
            Comment=Eclipse IDE
            Exec=eclipse
            Icon=/opt/eclipse/icon.xpm
            Terminal=false
            Type=Application
            Categories=GNOME;Application;Development;
            StartupNotify=true
- Launch Eclipse.
eclipse &
[SOURCE]
Installing PyDev and PyDev Extensions
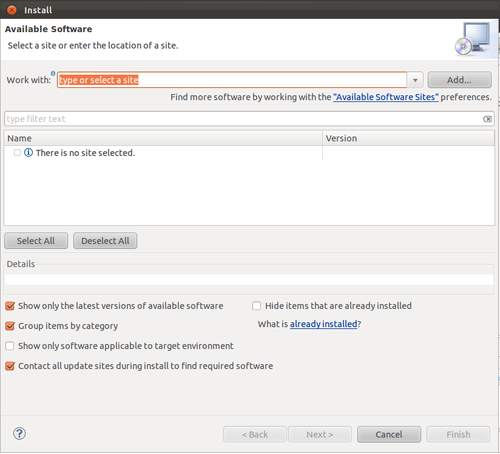
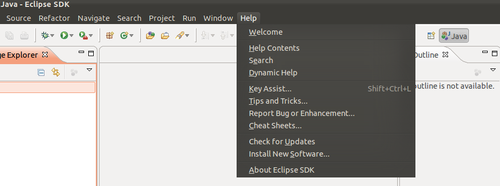
- To install PyDev and PyDev Extensions using the Eclipse Update Manager, you need to use the Help > Install New Software…

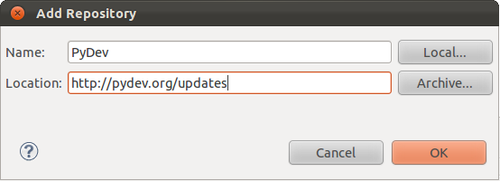
- Add the update site you want to work with by clicking the ‘Add..’ button. http://pydev.org/updates

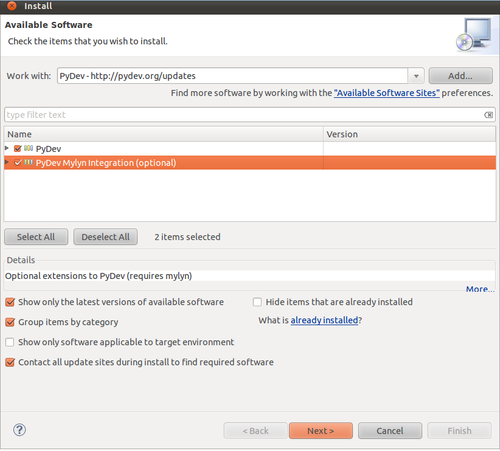
- Select the update site you entered and add a filter for PyDev so that it shows the contents of all the update sites that have PyDev.

- Uncheck the ‘Contact all update sites during install to find required software’
- Select the two main items to install and click ‘Next’.
- You may read the license agreement and if you accept, select the accept radio button and click ‘Finish’.
- Eclipse should automatically download the plugin contents and present you to a dialog asking if you want to restart the Eclipse or not.
[SOURCE]
Using Eclipse and PyDev for Django
This procedure assumes you’ve already installed Eclipse, PyDev as well as Python and Django.
- Open up terminal and create a directory for your project. Move to your created directory and runvirtualenv
            $ mkdir mysite
            $ cd mysite
            $ virtualenv env
            $ cd env/
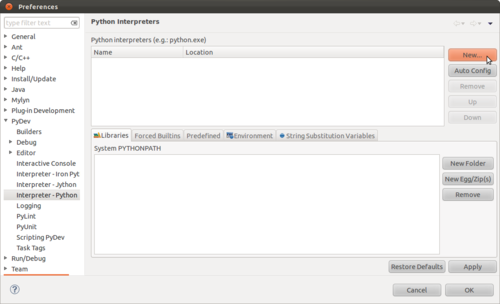
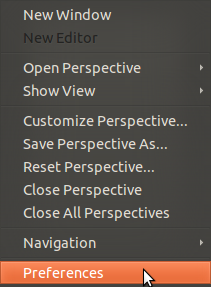
- Open Eclipse. Setup the Python Interpreter by clicking the ‘New…’ button. To do this, go to Windows > Preferences and on the left pane, expand PyDev and select Interpreter – Python.

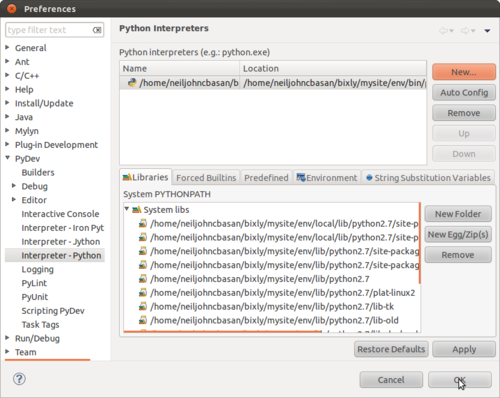
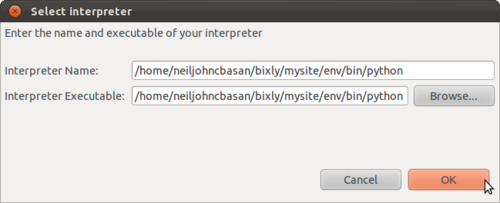
- Select the interpreter by browsing to the bin folder of your existing virtualenv and selecting the python executable. Hit the ‘OK’ button when finished.
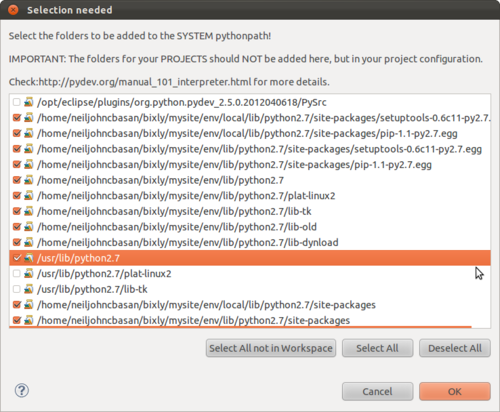
- You need to check the /usr/lib/python2.7. Hit the ‘OK’ button when finished.
- Hit the ‘OK’ button when you’re done adding a Python Interpreter.

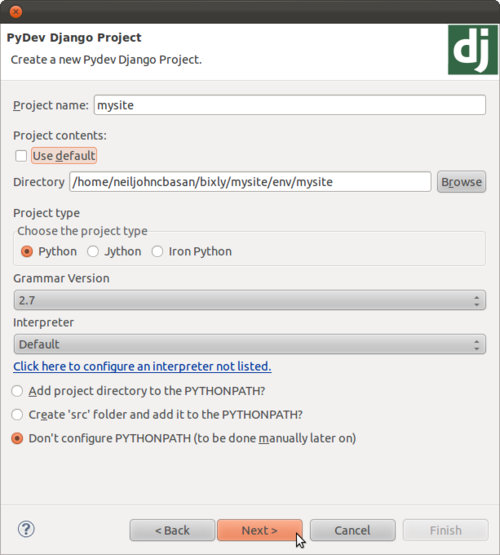
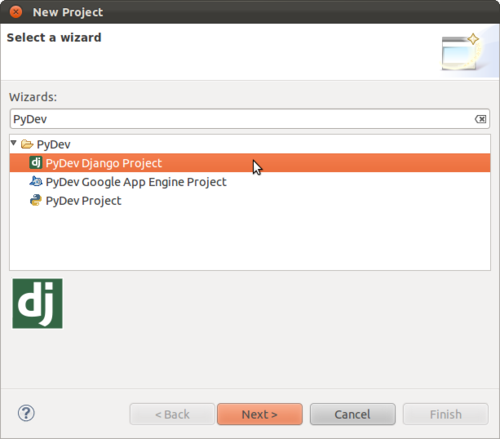
- Create a project on Eclipse by navigating to File > New > Project or Ctrl+n. Navigate and expand the PyDev folder. Select PyDev Django Project and hit ‘Next >’button. This is equivalent to creating a project using a command line :
$ django-admin.py startproject mysite
- Fill in the Project name. Uncheck the ‘Use default’ option under Project contents and browse to the directory you created using the command virtualenv. And make sure you select the ‘Don’t configure PYTHONPATH’ option. Hit ‘Next >’ button.

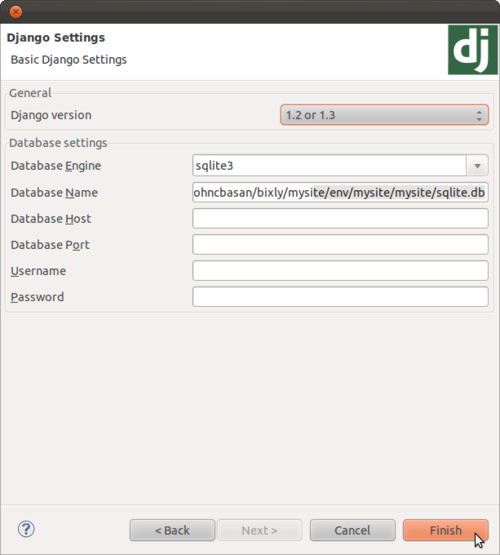
- Setup your database configuration.

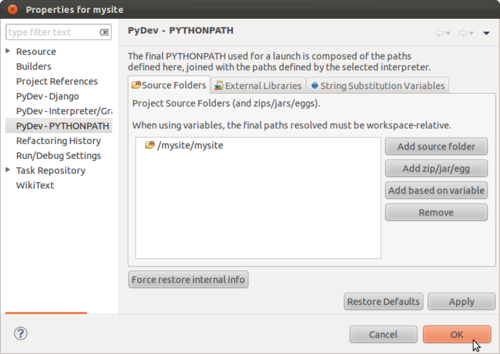
- Navigate to the Properties of your newly created project by right-clicking the root folder and selecting Properties from the context menu or simply hit Alt+Enter to bring up the Properties Window.

- Select PyDev – PYTHONPATH from the left pane and in the Source Folders tab, hit the ‘Add source folder’ button. You will be asked to choose a folder from your project directory.
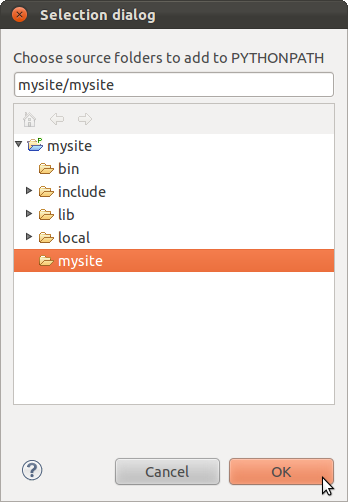
- Hit the ‘OK’ button whenever you’re done adding a source folder.
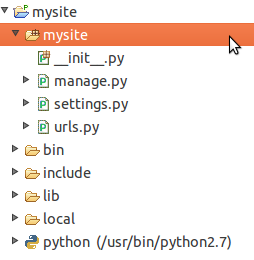
- This should have been added on your project’s PyDev – PYTHONPATH. Your project tree should look like on the image below.
- To test that this works properly, open up your urls.py file and Ctrl+Click on the patterns call – it should take you to defaults.py.
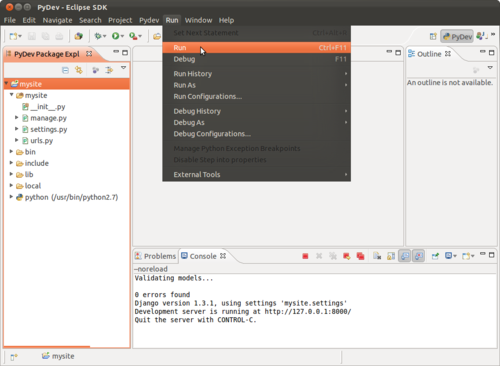
- To test the site, select your root directory and navigate to Run > Run on your eclipse menu or simply hit Ctrl+F11.